
The motorized bicycle has become a safe and efficient alternative to pedaling. Install an engine on your Bike using a bicycle engine kit I did and have been having fun ever since. MY Motorized Bicycle is soooo much fun that I ride just about every day. Good gas milage and VERY light on the pocketbook whether going to the store or just having fun are a few of the many advantages for owning a motorbike. ENTER HERE for a one stop place to buy Bicycle Engines and parts.
The best way to set up an engine on a bicycle is to get a 2 Stroke Bicycle motor Kit or a 4 Stroke Bicycle Engine Kit. EVERYTHING you need to power up your bicycle is included in

$119
these kits which includes the Engine,Sprocket and Chain,Chain Tensioner,Gas Tank,Muffler,Carburater,CDI (Condensor),Throttle and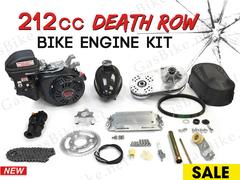 Cables,Clutch controller and cables. ALL needed parts,including the engine, comes in the bicycle engine kit.There are also instructions on how to install the engine. Many how to videos in the internet as well.
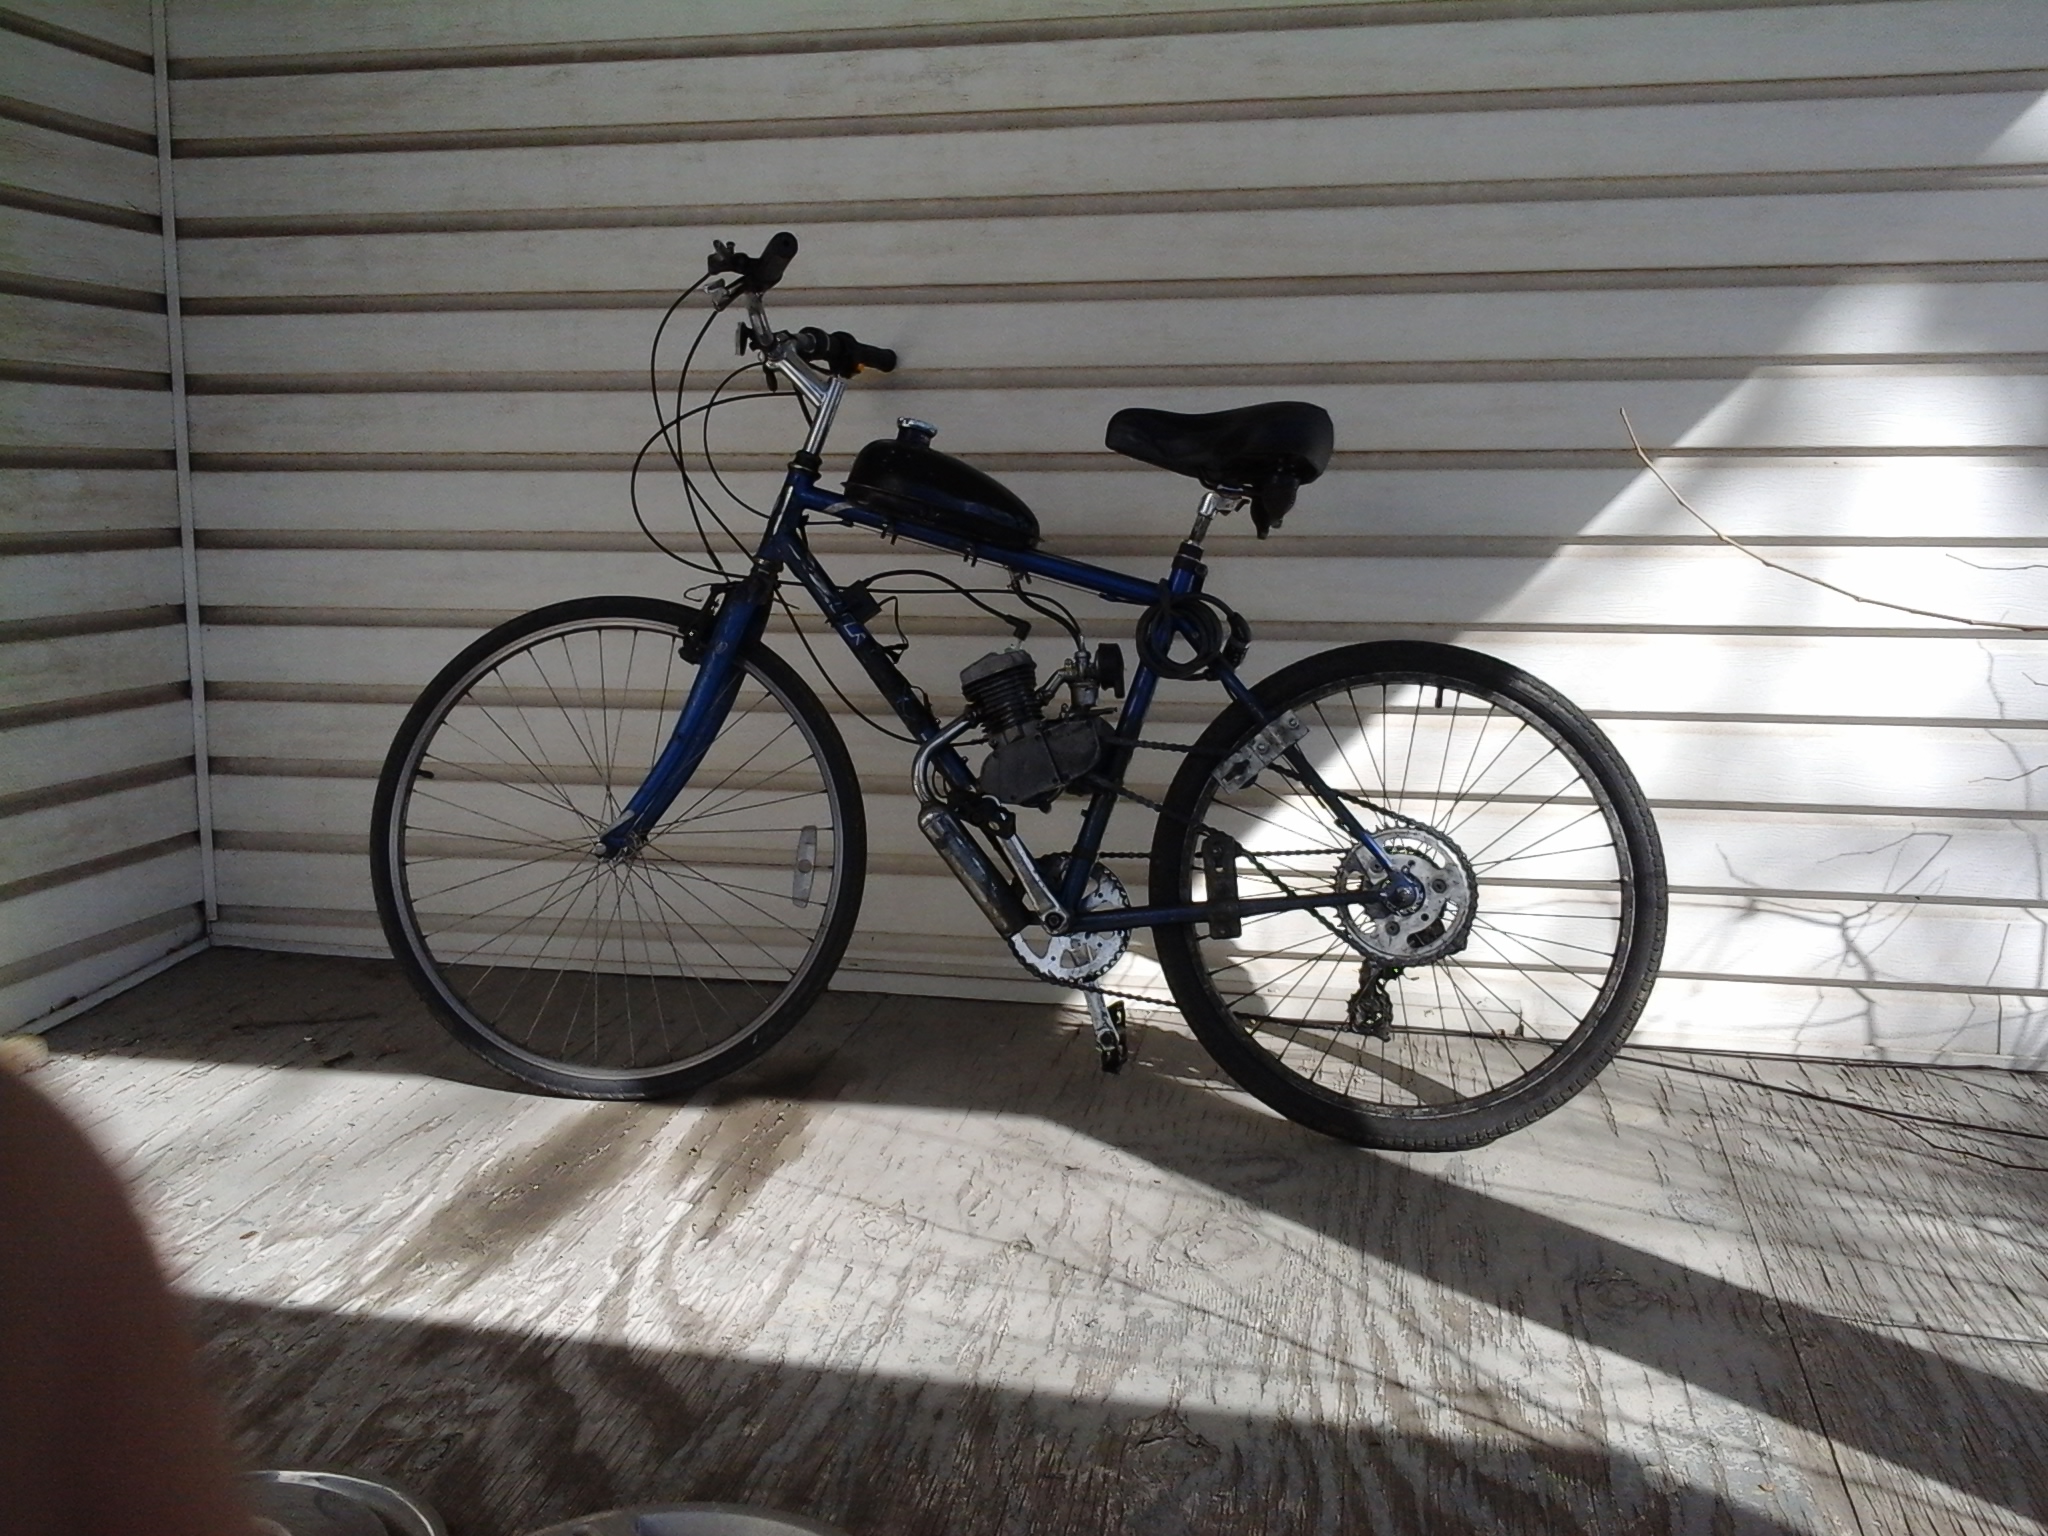
I set up a bike engine onto my Trek bicycle (motorized bicycle below) using an 80 cc bicycle engine kit. Been riding almost every day for the last 4 years. These bicycle engines are rather simple and easy to work on. Easy to maintain. Loads of FUN ! I ride my motorized bicycle anywhere in the city and  surrounding towns and lakes. I get stopped a lot cause people are intrigued and want to know more about my setup. People are amazed and curious about a motorized bicycle.Had 5 Thumbs up from people just on my last ride.
A Motorized Bicycle is Fun!
Ah yes riding down the scenic trails where cars cannot go or just cruisen the streets is just so much fun. I ride on sidewalks,trails,and in a pinch I can easily lift my Motorized Bicycle over a fence. Bicycle engines is making life easier for people around the world.
A Motorized Bicycle is Inexpensive!
GASBIKE has everything you need…Bicycle Engines, kits for both 2 stroke and 4 stroke,Beach cruisers, clutches,wheels,magnetos,mufflers,chains & sprockets (I recommend the CNC sprocket and adapter),carburaters,crankshaft parts,gas tanks,disk brakes,even shirts and eyeware gear.Think this is totally expensive ? Think again you can get a complete engine kit which includes EVERYTHING you need to motorize your bike for an incredible $119 ! I have seen the same type of kit advertised for as much as $300 dollars elsewhere. Folks this is not much Money for this much fun !
Extra Items Needed along with Bicycle Engine Kit Build
When you begin adding the engine kit to the bicycle of your choice, it is often necessary to get a few added supplies from your local automotive parts store. Some of these supplies should include Loc-Tite, 3M weatherstrip adhesive, a Paint Pen, Silicone sealant, and Teflon tape and/or electrical tape. These are essential accessories to have on hand because there are always things that need to be secured in place, marked for cutting, and to insure no leaks!
Be sure and use the Loc-Tite for all bolts that you do not want to have vibrated loose, the Teflon tape works well for fuel valve fittings and exhaust bolts, the paint pen is ideal for marking where to locate your chain tensioner and the link or links that may need to be cut out, and either weatherstrip adhesive or silicone to hold gaskets in place and prevent leaks from occurring.
A Motorized Bicycle is Easy to Work on!
One of my most favorite movies as a child was “Those Magnificent Men in their Flying Machines.” There was one scene where during the race (around 1909 airplanes) a pilot’s engine quit running so he landed on a street. A couple in a car pulled up. The problem with the engine was a blocked fuel line so the pilot asked the woman if he could have a Pheasant Feather which was in her hat. She gave him the Feather he cleared the fuel line and off he went. I thought that was soooo cool to be able to fix an engine on the fly. Most of the repairs on these bicycle engines can be done while on the side of the road.
Sprockets and Chains
A confusing question that people have about Motorized Bicycles is how is the back wheel driven ? It is driven NOT by using the bicycle sprocket but is instead driven by another sprocket (which comes with the kit) and is placed on the opposite side of the wheel where the bicycle sprocket is. Now because of the way this is set up you only have the 1 gear. The more teeth on the gear the more power the Motorized Bicycle will have but less speed.
I have one of the biggest sprockets which is 48 teeth. This gear takes me up some pretty mean hills but my speed is limited to around 30 mph which is moving at an almost scary speed for a bicycle. Want more speed but less power ? Then get a 36 teeth sprocket or a 32 teeth sprocket. Now if you want multiple gears that you can switch to while you are riding then you need to get what is called a JACKSHAFT. This add on works off your bicycle’s gears.
Upgrade your Sprocket
The sprocket that comes with the bicycle engine kits work ok but for one it is hard to align this sprocket to the engine sprocket. Another thing is that you have to keep tightening the nuts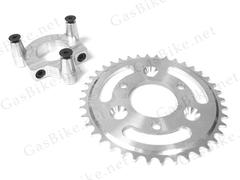 on these sprockets or you could break some wheel spokes. The answer is to upgrade to what is called a CNC sprocket and adapter assembly. Rather than use the spokes to drive the back wheel like the regular sprocket does the CNC sprocket uses the middle of the wheel. I used some Loc-Tite not only for the screws but for the adapter itself. The CNC sprocket works very well.
Restricted Exhaust
One of the most overlooked issues from poor engine performance is the exhaust pipe. If you have ridden your Motorized Bicycle (every day)for around 4 to 6 months and you notice a significant amount of power loss then it could be rust and carbon build up. The particles of rust and carbon break down from the running of the engine and collect in the small outlet tube at the rear of the muffler. After repeated buildup of rust and carbon particles the passage becomes blocked and the back 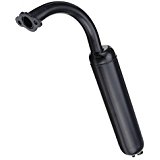 pressure is too high for the engine to run.
One of the best ways to identify this problem is to start the engine, when the engine stops, listen for air escaping from the muffler port. The escaping air is an indication of back pressure that is too high and not allowing the engine to run. Simply remove the muffler from the engine and start the engine again if the engine starts right up then you have diagnosed the problem and need to purchase a new muffler. Or sometimes the muffler is not welded together and so you can take the muffler apart and then clear out the port. What I do is take out the muffler part of the tail pipe and run it that way. It is a little loud but GEES does it run good!
Ok just for an update on this subject
My engine was barely getting me up any hills. I had the muffler off so that could not be the issue. Since I had run this engine for probably many thousand of miles my father and someone else suggested that the rings were wore down. Engine was wore out. I was just about ready to get another engine when I thought I would try one more thing. What if the tailpipe was plugged ? Many of you are probably thinking is’nt the muffler and tailpipe the same ? No they are not. The tailpipe is just that a pipe running from the engine exhaust. The muffler attaches to the end of the tailpipe and has much more restriction of airflow properties. I took off the tailpipe and put on a different and shorter tailpipe. WHOA what a difference. My engine was fine. Once again I am screamming up the hills.
ENTER HERE for a one stop place to buy Bicycle Engines and parts.
More on Restricted Exhaust
Another little tip if you are not like me and want the muffler attached for a quieter ride. A couple of mufflers I got restricted my engine power by up to 35%. I think it was done on purpose possibly because of some crazy local law some place.To modify this muffler for an extra 35% power take apart the muffler if you can. You will see a little metal tube that runs to almost the top of the tail pipe.The tube being this close to the top of the tailpipe is an obvious restriction of airflow. I just cut about 2 thirds of this metal tube off. WHOAH what a difference !
One more thing. To upgrade from the regular tailpipe you can get what is called an Expansion Chamber muffler. I have never used one of these types of mufflers but I have heard good things about them. These expansion chamber mufflers are supposed to improve the power of the engine having something to do with airflow. I have seen these on Motorcycles.
Clutch
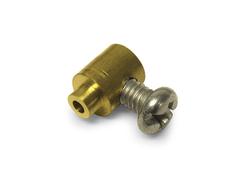
Clutch Cable Lock
Clutch problems are usually simple to fix. Example would be if you are not able to disengage your clutch fully then the problem is probably that the screw on the clutch cable lock has come a little loose. The clutch cable lock is what holds the clutch wire on the clutch arm.
Another tip that I had to learn the hard way is to keep the clutch cable oiled. I broke many cables before I began to do this. I just spray WD-40 at one end of the cable until it drips out from the other end.
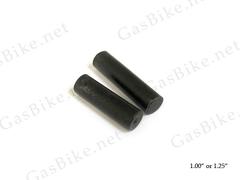
Bucking Bar
These first 2 issues will be what you will see the most but I have run across 2 other clutch issues only once. I have a saying…Anything is easy once you know how. One time I noticed that I was losing my clutch even after adjusting and tightening the clutch cable lock.
Scratched my Head a bit then figured it out. When you squeeze your clutch handgrip it pulls the cable which pulls the clutch arm. This in turn pushes the bucking bar (small 1 inch rod) which in turn pushes on a 8mm bearing. This bearing pushes on the clutch flywheel which disengages the clutch. The bearing turns with the clutch flywheel until the clutch is engaged. Well apparently there was no grease where the 8mm bearing was and so it wore down and in turn wore down the bucking bar. To remove the bucking bar and 8mm bearing just take off the clutch cover and you will see the bucking bar sticking out.To get the 8mm bearing out I used a magnet. Do not forget to add Grease !
More on Clutches
The second issue with a Clutch that I had (only had this issue once) was once again I kept losing the Clutch. After diagnosing the problem to be nothing I had ever come across before I realized that the entire Clutch was moving to the right every time I tried disengaging the Clutch. I
  took off the Clutch cover and found a large nut that at least helps hold the clutch in place. By tightening this nut I noticed that it pulled my Clutch back in place and I regained my Clutch. I was able to ride for a few days but then once again I had no Clutch. I noticed that the nut was loose again so I tightened it.
This cycle kept happening until one day the nut would just come loose after one block. I tried keeping the nut in place using Liquid Steel. Did not hold at all so I investigated further and found what was really holding the Clutch in place was a small half moon pin on each side of the clutch. The grooves in the Clutch that these pins would align with were completely wore out. I replaced the entire clutch and then all was fine.
One last thing on the 80 cc clutch. I have NEVER had to replace the clutch pads because they wore out and I have put at LOT of miles on these engines. I saw a video on the internet one time where supposedly this guy burned up his clutch pads just after one week. I do not believe him. The video was then about replacing the pads which was the correct way to do it.
Fuel
8/11/2017. Earlier in the spring there were several occasions when I would be at my destination or at a stop sign and would shut my engine off. Problem is the engine would not start up again. Had to let it set for several hours before it would start. Left me stranded one time for about 12 miles from my house. I talked to someone that looked like a biker and he said that my spark plug was a little wet. About 10 minutes after he left (a total of about 30 minutes with the engine not starting) it started up again.
A few days later l talked to a man who had the same setup as me and he said that he always ran his fuel mixture at 40 to1. My fuel mixture was at 32 to 1. I decided to start using a mixture of 40 to 1. At the same time I noticed that the biker did not tighten my spark plug very tight. I tightened my spark plug and started running a fuel mixture at 40 to 1 and have not had any problems since. I think the issue was fuel mixture ratio.
A Few more things
For the most part from my experience using parts from other similar bicycle engines sold at different companies will work BUT not always. I got lazy one time and did not put the air filter back onto the engine after working on it. One day a piece of metal got lodged between the piston and the cylinder. Engine locked up. I tried to mix and match engines that I had got from various places. All seemed fine until I noticed that the length of the piston was too long. I used several aluminum gaskets to make up for the extra length of the piston. Engine started but I only had about one tenth of the power. Moral of the story is try to stay with one company when purchasing Bicycle Engines, kits and/or Bicycle Engine parts.
